How to Add Insulation to Existing Walls With Less Mess?
We can add insulation to existing walls with less mess by choosing access points through siding, drywall, or attic areas instead of removing entire wall finishes. Our professional inspection identifies cavity obstructions, existing insulation, utilities, moisture concerns, and the best material for the wall assembly.
Key Takeaways
- Small, planned access holes let our installers fill enclosed wall cavities while limiting drywall or siding removal.
- Exterior access can preserve interior finishes. Interior access may work better if siding repairs prove difficult. Attic access can also serve some top-floor walls.
- Dense-pack cellulose, blown-in fiberglass, and injection foam fit different wall depths, cavity conditions, moisture needs, and repair requirements.
- We address moisture damage, active leaks, pest activity, and damaged insulation before we add new material to a wall.
- Insulation can improve thermal comfort and reduce some airborne noise. Air sealing and other upgrades may still improve overall performance.
Least-Mess Ways to Insulate Existing Walls
We can often add insulation to existing walls without removing all the drywall or siding. The usual minimally invasive insulation method uses small access holes to fill enclosed wall cavities, followed by careful patching or plugging.
It’s important to set clear expectations. We can reduce disruption, but retrofit work is never completely mess-free. Every approach requires access holes, insulation installation, and finish repairs that match the wall as closely as possible.
We select the access method after reviewing the building’s construction, wall finish, existing insulation, and repair expectations. Common options include exterior siding access, interior drywall access, and attic access when the top of a wall cavity is reachable.
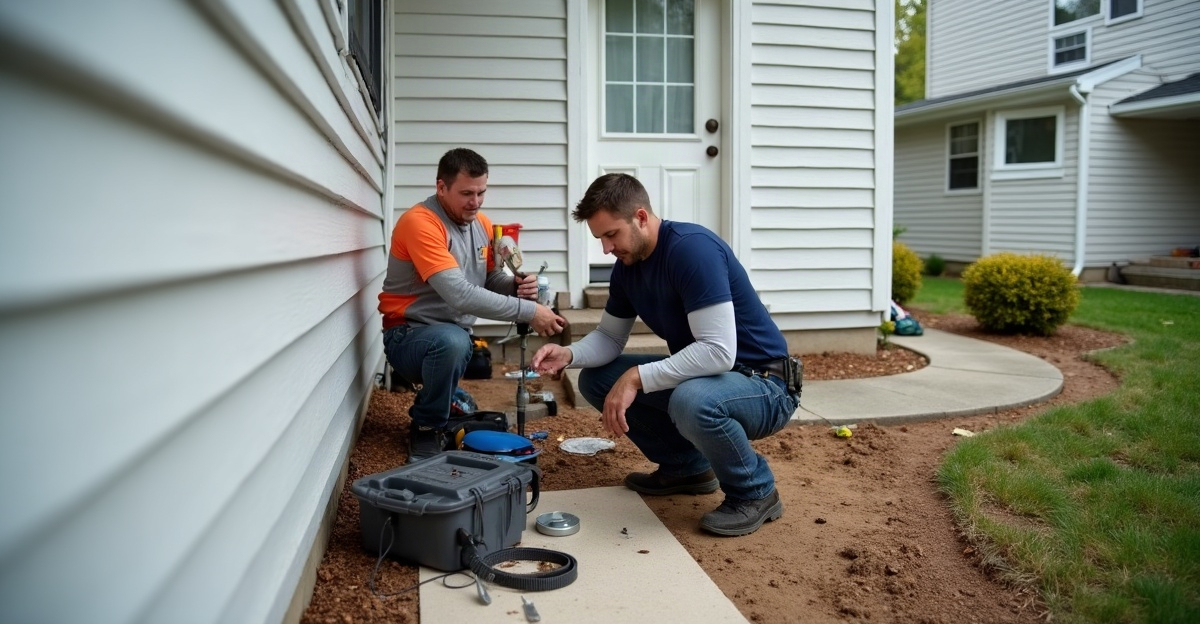
Exterior access may preserve interior paint and wall finishes. We drill through siding in planned locations, install insulation through small holes, then seal the openings with compatible plugs or repairs. Interior access can work well where exterior finishes are difficult to remove or repair. In that case, we patch the drywall holes and prepare them for repainting.
Attic access can be the least disruptive option for some top-floor walls. However, framing, fire blocks, and tight roof geometry may limit where insulation can enter. A wall inspection helps us determine whether we can insulate walls without removing drywall and still achieve consistent coverage.
For a clear foundation on materials and performance, see our guide explaining what insulation is. The right method depends on the wall assembly, not a one-size-fits-all solution.
What Happens During a Low-Disruption Wall Insulation Project
A professional blown-in insulation installation process starts with an inspection. We identify likely wall cavities, framing patterns, existing insulation, electrical equipment, plumbing, gas lines, exterior fixtures, and areas that may need separate access.
Next, we choose access points and drill insulation access holes in locations that provide practical coverage while limiting finish repairs. We install wall cavity insulation with equipment suited to the selected material, then check coverage as work progresses. After installation, we patch interior openings or plug and seal exterior openings, clean the work area, and review completed areas.
Walls are not always open from the bottom plate to the top plate. Fire blocks, horizontal framing, structural blocking, window headers, and other obstructions can divide a cavity. Those conditions may require additional holes so we don’t leave uninsulated sections behind.
Experienced installers plan around hidden wall conditions rather than drilling blindly. Building knowledge and inspection methods help reduce the risk of damaged utilities, missed cavities, and uneven retrofit wall insulation.
Before work begins, we recommend moving furniture away from interior work zones and clearing access along exterior walls. We also protect floors and nearby belongings. Outside, we discuss landscaping, hose bibs, lighting, electrical equipment, shutters, and wall-mounted items before choosing the access plan. Clear preparation supports cleaner work and smoother patching of insulation holes afterward.
For projects that call for loose-fill materials, our blown-in insulation service provides a practical way to fill many enclosed wall cavities with limited demolition.
Choosing Between Cellulose, Blown-In Fiberglass, and Injection Foam
No single product is the best insulation for existing walls in every building. Material selection should reflect wall depth, cavity condition, moisture history, finish access, budget, and future repair needs. Wall insulation R-value also matters, but performance depends on complete coverage and the condition of the full building envelope.
Dense-Pack Cellulose
Dense-pack cellulose is commonly used for enclosed walls. Installed at the correct density, it can fill cavities tightly and help limit air movement inside the cavity. It is often a practical choice for retrofit work, though proper installation density is essential to reduce the chance of settling.
Blown-In Fiberglass
Blown-in fiberglass is lightweight and widely used in retrofit applications. It may fit a wall assembly or installation method that favors fiberglass. Complete and consistent fill remains critical, since gaps reduce thermal performance. We offer fiberglass insulation options after evaluating the wall and access conditions.
Injection Foam Insulation
Injection foam insulation can fill irregular cavities and may provide air-sealing benefits in certain assemblies. It requires careful evaluation of material compatibility, wall moisture behavior, and future repairs. Foam is not automatically the right answer for every wall, even where it can reach difficult spaces. Our spray foam insulation service can help determine whether foam is appropriate for the specific assembly.
We avoid broad promises about energy savings. Actual results depend on wall depth, existing insulation, air leakage, HVAC equipment, climate, occupancy, and the overall condition of the home.
Fix Moisture, Air Leaks, Pest Damage, and Other Problems First
We address active leaks, bulk-water intrusion, wet insulation, mold, damaged siding, and drainage problems before installing new wall insulation. Adding insulation to a compromised wall can trap moisture and lead to larger repairs later.
Air sealing and insulation work best together, but insulation does not replace air sealing. Leaks around wiring and plumbing penetrations, attic bypasses, windows, doors, crawl spaces, and duct openings can affect comfort even after wall cavities are filled. We recommend evaluating professional air sealing as part of the insulation plan.
Rodent-damaged insulation also needs attention before new material goes into the wall. Nesting material, droppings, damaged insulation, and animal entry points should be removed or repaired first. In some cases, the proper first step is insulation removal so we can assess the cavity condition.
An inspection may uncover deteriorated sheathing, hidden water damage, missing flashing, or gaps around windows. We recommend asking whether a proposal includes moisture repairs, rodent exclusion, air sealing, or only cavity insulation. That distinction matters, especially where wall moisture problems are present.
Thermal Comfort and Sound Control: What Wall Insulation Can and Cannot Do
Filling empty cavities adds thermal insulation that slows heat transfer. This can reduce hot or cold wall surfaces and help improve home comfort from room to room. Energy-efficient wall insulation may also support better HVAC performance, but results vary with air leakage and other building conditions.
Thermal performance and sound control are related, yet they are not identical. Wall insulation for soundproofing can reduce airborne sound by adding material inside the cavity. Voices, television noise, and some outdoor noise may become less noticeable after cavities are filled.
Still, insulation alone will not fully stop impact noise, flanking noise, or sound that travels through doors, vents, floors, ceilings, and framing. To substantially reduce noise through walls, a project may need resilient channels, additional drywall layers, acoustic sealant, upgraded doors, or improvements to vents and floor-ceiling assemblies.
We assess sound concerns separately from thermal needs. Our wall soundproofing service helps identify whether cavity insulation is sufficient or whether the assembly needs further upgrades.
When a Professional Assessment Is the Safer Choice
We recommend professional insulation installation when wall conditions are unknown or when there are signs of moisture damage, pest activity, old wiring, plumbing concerns, gas lines, unusual construction, or uncertain existing insulation. Drilling into an existing wall without a plan can create safety risks and unnecessary repairs.
Older buildings may also contain asbestos-containing materials or lead-based paint. Structural blocking can prevent an insulation hose from reaching the entire cavity. A site assessment helps determine whether exterior siding access, interior drywall access, attic access, or targeted openings will create the least disruption.
Permit requirements, code expectations, wildfire considerations, climate conditions, and wall construction can vary across Stockton, Sacramento, the Central Valley, and surrounding Northern California communities. A qualified wall insulation contractor can account for those local factors before work begins.
We recommend requesting a transparent insulation estimate that identifies the material, access method, expected patching or finish repairs, cleanup plan, moisture or pest concerns, and recommended air-sealing work. For Stockton insulation, Sacramento insulation, and other Northern California insulation projects, we can provide a clear scope before installation. Contact us through our insulation consultation page to discuss the wall condition and access options.